Potting up your plants with a dry mix is fine, but seems to work much better
when pre-moistening the mix to a damp consistency. Give it a try!
Keep in mind
that you NEED to repot your violets at least once a year. If you
have added Marathon as a pest preventative, this only lasts for 3-4
months. After that, you are basically unprotected. Simply
keep an eye on your plants after about 6 months. If you see signs of
weakening or slowed growth, repot it!
Also, use of Marathon should be done sparingly. A dash
is all that is needed, or the equivalent of 1/16 of a tsp, sprinkled in
the very bottom layer of the pot. Make sure it is
distributed across the bottom as too much Marathon will clump together
creating a silly putty consistency and kill out the plant completely.
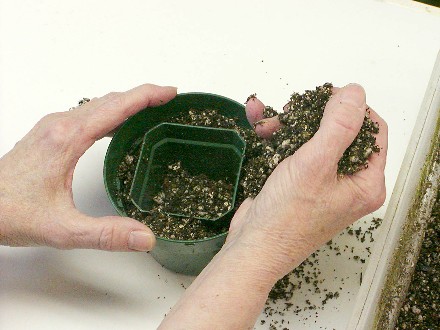
Mix
Packing problem - Over packed
mix (pressing the media down too much) will result in too
much water being held at the roots. It also starves the roots of
much
needed oxygen.
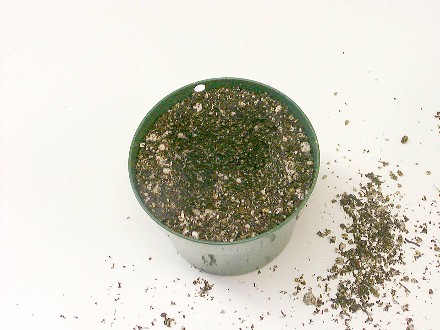
Under packed
mix (not tapping the pot on the table to remove huge pockets of air) means starving the roots of water.
It simply can't evenly absorb the water when there are huge pockets of
air. You may notice plants that you have to soak in a dish of
water when the others are doing just fine. Probably needs to be
repotted for just this reason. When potting plants, tap them on
the table for settling. Never push down with your finger.
Tapping will remove any large air pockets.
Get your finger out of that pot!
- Whether it be to remove a
leaf or a spent bloom, remember - Don't
use your fingers!!! Use your sucker plucker, a pencil, any blunt
object to remove stems. While your finger is probably pretty blunt
- that's the wrong tool for the job! Any time your finger touches
the mix - you have packed it down. Even if only slightly - you
have displaced the oxygen from that space that the plant was using at
the root system. Check for watering needs by lifting
the pot and feeling the weight.
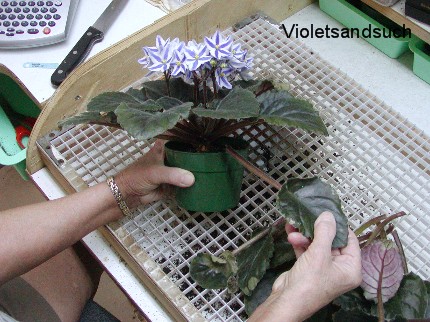
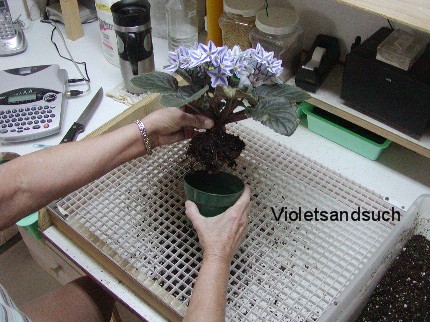
1. Remove the bottom rows of leaves until you have 2
to 3 rows of mature and maturing leaves plus the small crow leaves. This is
done now so you still have the pot to hold on to.
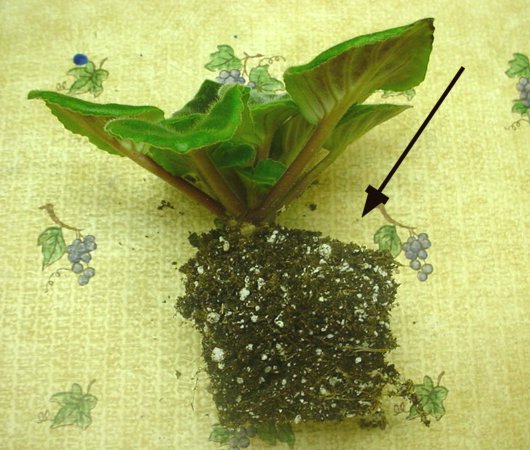
2. Remove the plant from the pot.
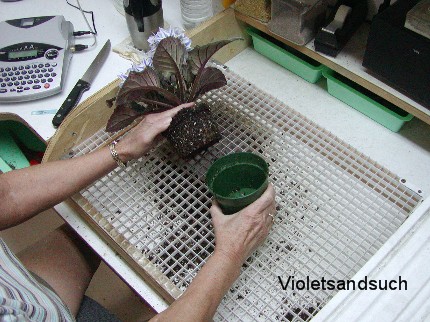
3. After you have removed the
plant from the pot, lay it carefully on its side and determine how much of
the root ball you are going to prune. If some of the neck is showing you
will want to remove that same amount of the root ball plus a little more.
Remember you must have enough root ball left to support the amount of plant
you have left after you groomed it. If you do not think you do remove
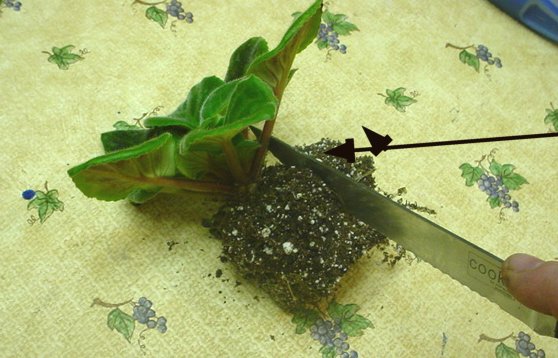
another row of leaves. When you think you have a good ratio of plant and
roots take a sharp knife and cut off the desired amount of the root ball.
4. The root ball after it has been pruned.
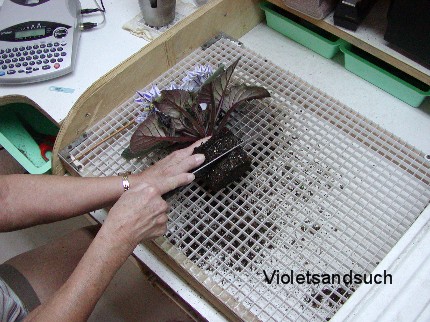
5. Once the bottom portion of
the root ball has been pruned start to loosen up the remaining root ball
with a skewer or some kind of a pointed object by dragging it down through
the root ball. In the picture we are using a paint brush handle.
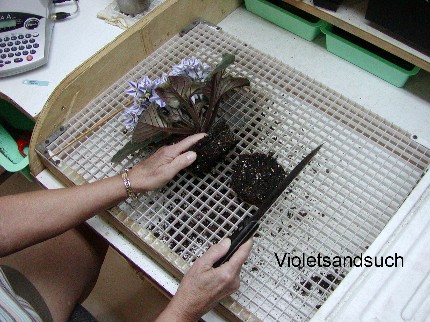
6. Once you have loosened up
the root ball, prepare another clean pot of the same size that the plant was
originally in. Place enough soil in the bottom of the pot so that the top of
the neck of the plant is approximately 1/4 “ below the top of the pot. Fill
with some soil and tap on the work surface to settle in the plant and soil.
Add more soil until the soil is at the desired level, approximately 1/4:”
below the pot rim.
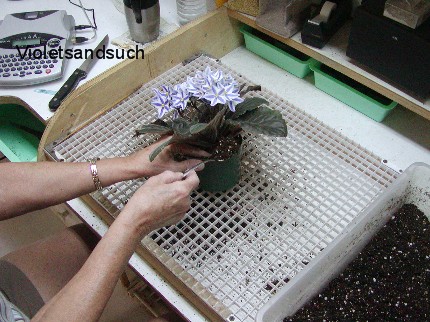
7. Filling the pot with soil
and being careful not to pack the soil down in to the pot. It is best to tap
the pot on the work surface to accomplish this.
The finished
repotting.
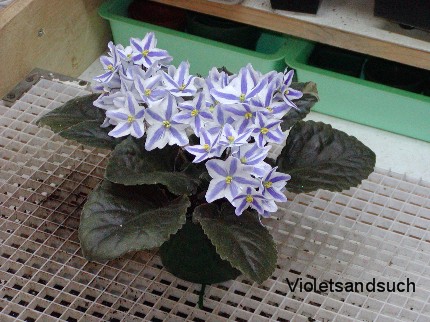
8. Put the newly
repotted plant back under the lights and watch it for a few days. If you
notice the plant starting to go limp do not panic. This is the sign of shock
and that you probably did not get the plant to root ratio right. Put a leaf
support ring on the plant to hold the wilted foliage up. If you do not when
the plant starts to recover the foliage will stay drooped down the side of
the pot and be very ugly. If you do not have a leaf support ring you can
make one from a paper or Styrofoam plate. Some people would put this plant
inside of a plastic tent until it has recovered but I do not. I put it right
back on the shelf. The plant should show signs of recovery or be recovered
in approximately two weeks.
Mold potting is probably the
best way to repot a plant up to the next size pot because you do not disturb the
roots and set the plant back. Mold potting does not always apply in all
situations however.
We are going
to assume that we are going from a 2 1/2" pot to a 4" pot (standards).
1. Put a little soil
mix in the bottom of the 4' pot, now set a clean 2 1/2" pot inside the 4" pot.
The rim of the 2 1/2" pot should be level to just a hair below the 4" pot rim.
If it is not then add or remove enough soil until it is.
2. Make sure the soil
you are using is damp but not wet. Start putting soil in between the two pots
and as you fill, tap the pot on the work surface to make sure the soil is
filling the gap between the two pots. Keep filling in between the pots until
the gap is full. Keep tapping the soil down until full. There should be no air
space between the two pots. Gently remove the 2 1/2" pot and you should have a
perfect 2 1/2" pot shape in your 4" pot. If the dirt keeps falling in and it
won't hold its molded shape, the soil is probably too dry or is not packed in
enough.
Many people
have a hard time getting the plant centered when they plant their violets.
You want your plants centered as they look and grow better. The best
method we have found is to use a basic coffee stirrer. You can use this
method for newly potted plants and even plants that have been potted for a few
weeks.
This plant is
clearly off center.
Insert the
coffee stir stick to the side of the plant. Begin slightly pushing
to the direction you need the plant to move.
At the same
time you are pushing, tap the pot on the table to allow the mix to redistribute.
If the plant
is off-center and is root bound, the repositioning is a bit more drastic.
Lay the plant on it's side on a hard surface and determine the centerline.
The amount of roots that goes beyond the centerpoint is what will need to be
removed. This removes a section of the roots, but not enough to harm the
plant. To repot the plant, you may want to visit the mold potting
section of this page.
The plant may
show signs of shock for a few days, but will recover within 2 weeks.
All pictures with the Violets and Such footprint are
used with the explicit permission of Robert Albro.
These photos may not be copied or reproduced for any reason
and are considered copyright material that falls under the
property restrictions of AVChimera.com